Follow Me On Social Media!

Stained Glass Cookies: Irresistibly Sweet & Beautiful Treats
Introduction to Stained Glass Cookies
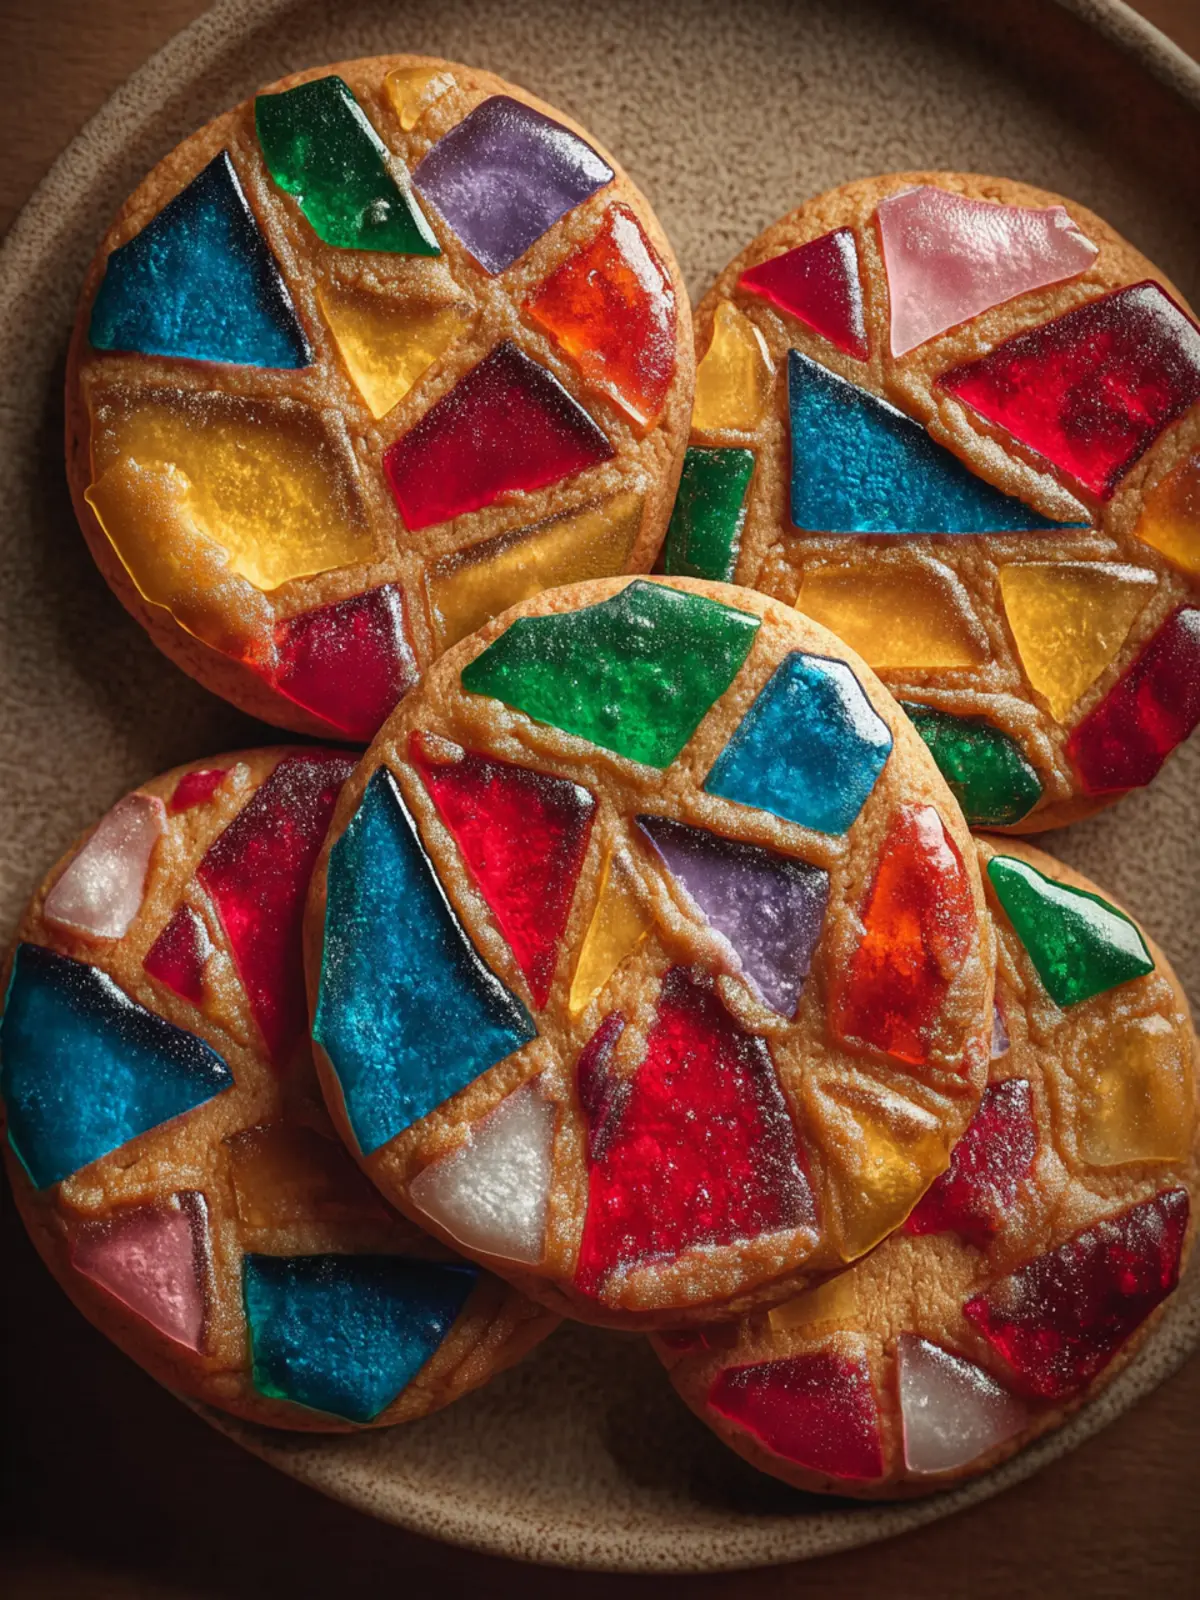
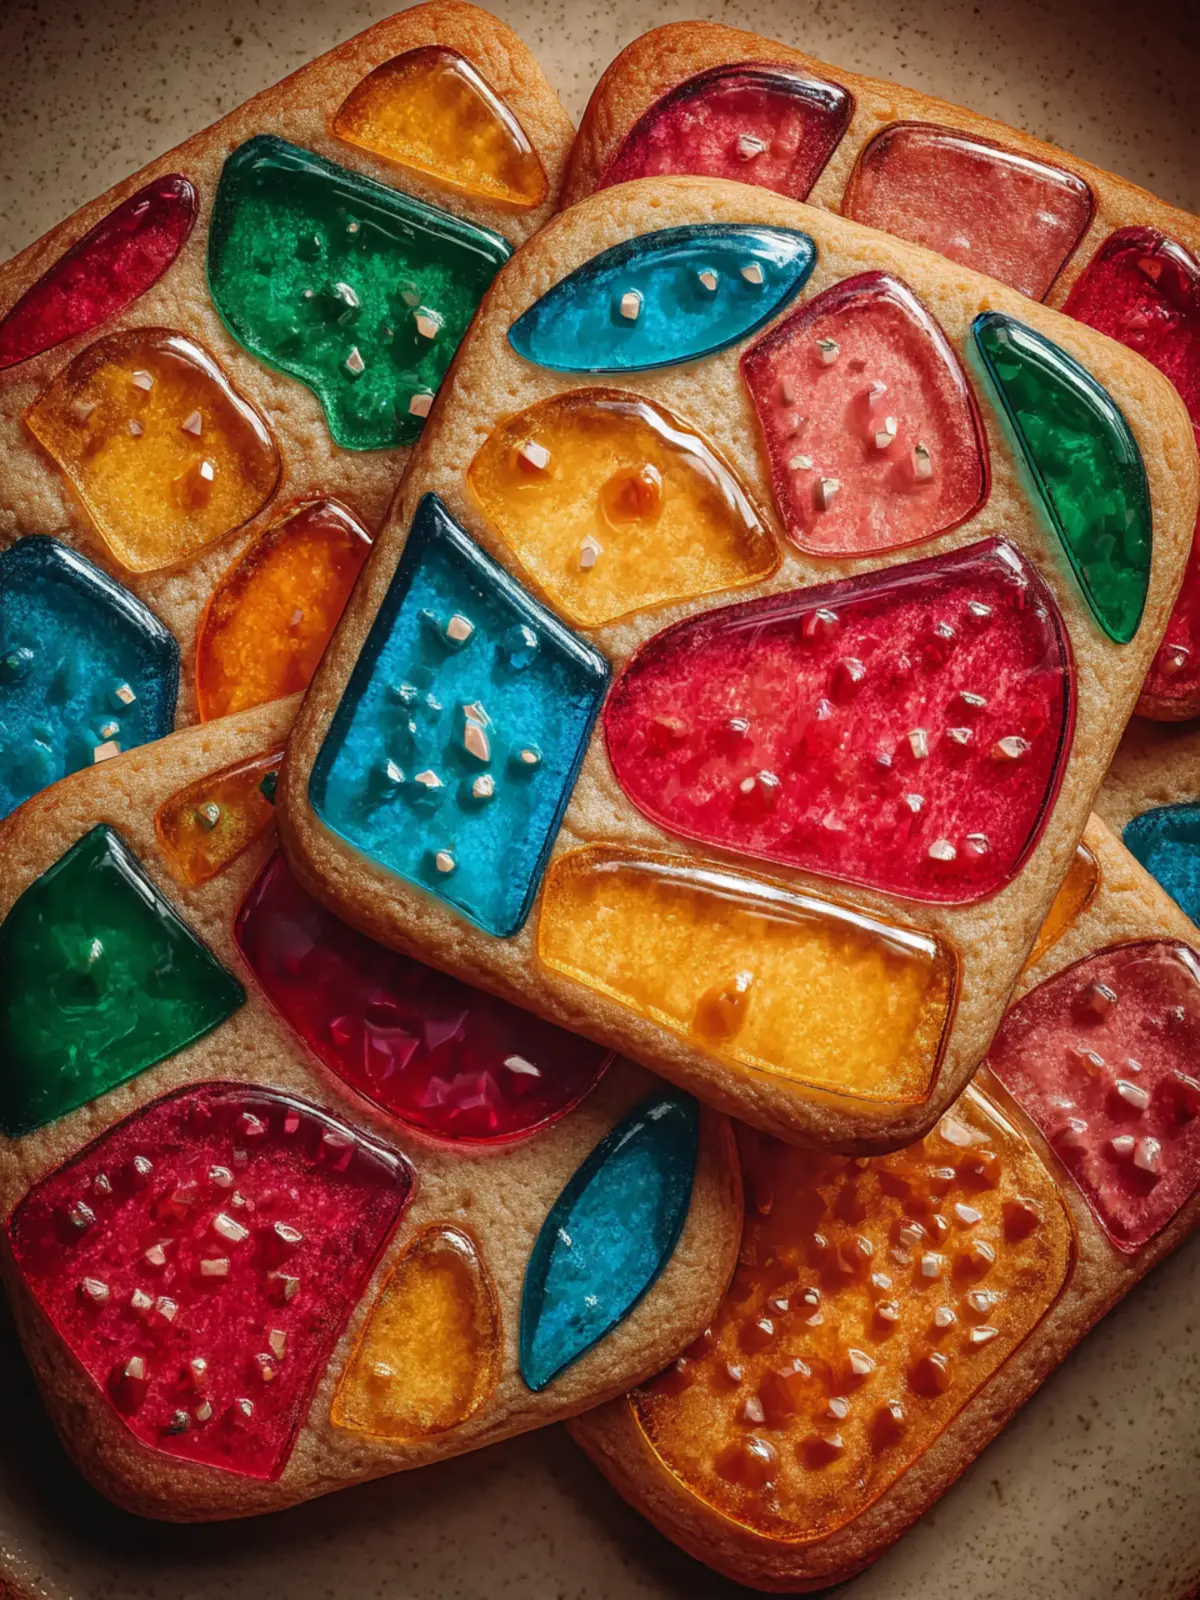
Stained glass cookies are not just any dessert; they are a delightful expression of art and sweetness that brings a magical touch to your holiday gatherings. Picture this: crisp, buttery cookies cut into festive shapes and featuring bright, colorful centers made from melted candies. The moment you bite into one, you’re treated to a burst of flavor that reminds you of childhood memories spent crafting decorations and indulging in sweet treats. These cookies don’t just taste good—they look good, too, bringing a charming aesthetic to your holiday dessert table.
What makes stained glass cookies a holiday favorite?
One reason stained glass cookies have earned their spot as a seasonal favorite is their versatility. You can tailor the shapes and colors to reflect whatever holiday you’re celebrating. Whether it’s intricate snowflakes for winter festivities or vibrant stars for summer occasions, these cookies can fit any theme, making them a fun project for friends and family alike.
The joy of baking these cookies is often doubled when shared with loved ones. Imagine gathering around the kitchen with friends, mixing dough, rolling it out, and then cutting it into festive shapes. Children, in particular, find the process mesmerizing, especially when the vibrant candies transform into colorful windows in the cooled cookies. Plus, they make for delightful homemade gifts that show thoughtfulness and creativity.
The tactile nature of making stained glass cookies also adds to their appeal. Watching the colored candies melt and fill the shapes creates a sense of anticipation and satisfaction, which heightens the experience of baking. With a few simple ingredients, you can craft these delicious works of art that not only taste exquisite but also spark joy in everyone who sees them.
So, why not gather your ingredients and embark on a flavorful journey? After all, stained glass cookies are more than just a treat—they’re a celebration of creativity, tradition, and the joy of sharing delicious moments with those we care about.

Key Ingredients for Stained Glass Cookies
Stained glass cookies are not just a delightful treat; they bring a splash of color to any occasion. To create these stunning cookies, each ingredient plays a crucial role in both flavor and presentation.
Butter
Butter is a key player in the dough, providing richness and a melt-in-your-mouth texture. I always opt for unsalted butter, allowing me to control the saltiness of my cookies perfectly. Plus, it blends seamlessly with sugar to create a creamy batter.
Sugar
Both granulated and powdered sugar are essential here. Granulated sugar helps in creating the perfect sweet balance, while powdered sugar gives a delightful sweetness and helps in rolling out the dough without sticking.
Eggs
Eggs contribute moisture and structure to the cookies while aiding in leavening. When using eggs, make sure they’re at room temperature; this helps them blend more easily into the batter for a smooth texture.
Flour
All-purpose flour is the backbone of any cookie dough, and here it provides the necessary structure. If you’re looking for a gluten-free option, a 1:1 gluten-free blend can work well, yielding equally delicious results.
Candy
The true star of stained glass cookies is the candy. I recommend using hard candies, like Jolly Ranchers, which melt beautifully to create that stunning stained glass effect. Crushing them into small pieces ensures an even fill in each cut-out, transforming your cookies into edible art.
With these key ingredients, your stained glass cookies are sure to be a showstopper at your next gathering!
Why You’ll Love This Recipe
Stained glass cookies are not just a treat; they are a delightful experience that sparks creativity and nostalgia. Picture gathering around the kitchen, flour dusting the air, and vibrant candies transforming into colorful masterpieces. Making these cookies is an engaging process, perfect for inviting friends or family to join the fun.
-
Visual Appeal: The moment you pull these cookies from the oven, their radiant colors shine through. Each cookie is like a tiny work of art! You’ll love showcasing them at events, where they often steal the show.
-
Flavorful Crunch: With a base sweet dough balanced by the chewy, sugary candy centers, every bite offers a harmonious blend of textures. These cookies are not just eye candy; they taste as good as they look.
-
Personal Touch: Experimenting with different shaped cookie cutters lets you personalize each cookie, making them ideal for themed parties or holiday gatherings. Want a star-shaped cookie for Christmas? Or a heart for Valentine’s Day? The choice is yours!
Baking stained glass cookies allows you to connect with your inner artist while indulging in a sweet treat. With each batch, you create moments to share and memories to cherish, making this recipe truly special.

Tips for Making Perfect Stained Glass Cookies
Creating stained glass cookies is an exciting mix of culinary art and creativity. To ensure your cookies shine brightly both in flavor and appearance, consider these helpful tips.
Choose the Right Candy
Opt for the best candy for the “glass” effect. Hard candies like Jolly Ranchers work wonders due to their vibrant colors and transparency once melted. Use a variety of colors to create an eye-catching design. Crushing them is key: aim for small, even pieces to allow for a smooth melt that forms a crystal-clear look.
Chill the Dough
A crucial step for achieving the perfect shape is chilling your dough. After mixing the ingredients, wrap the dough in plastic wrap and pop it in the fridge for at least an hour. This makes it easier to roll out and helps maintain the intricate designs when cutting shapes.
Watch the Baking Time
Every oven is unique, so keep a close eye on your cookies as they bake. Start checking them a few minutes before the recommended time. Aim for a light golden color around the edges; the center should look set but still soft. The candy will continue to melt overnight, so don’t worry if it’s not completely clear right after baking.
Enjoy the Process
Remember, baking should be fun! Take your time, experiment with shapes, and let your creativity flow. Your stained glass cookies will not only be delicious but also a beautiful centerpiece for any gathering. Happy baking!
Time Details for Stained Glass Cookies
Creating those enchanting stained glass cookies is a delightful endeavor that weaves a bit of magic into your baking routine. Understanding the time commitment will help you plan your cookie-making adventure seamlessly.
Preparation Time
This step typically takes about 30 minutes. Gather your ingredients, mix the dough, and roll it out into beautiful shapes. Don’t rush—enjoy the process of designing your cookie creations.
Baking Time
Once your cookies are prepared, they generally require 10-12 minutes in the oven. Keep an eye on them! You want that perfect golden edge.
Total Time
In total, you’ll spend around 40-50 minutes from start to finish. It’s a small investment for a cookie that will impress friends and family with its festive charm!
Nutritional Information for Stained Glass Cookies
Creating stained glass cookies is not just about aesthetic appeal; they’re also a delightful treat that can be part of a balanced diet. Here’s a closer look at the nutritional components you’ll find in these colorful delights:
Calories
Each cookie contains approximately 120 calories. While they may be small, it’s easy to enjoy these vibrant treats without getting too far off track in your daily caloric intake.
Protein
You’ll get around 2 grams of protein per cookie. Though not a primary protein source, these cookies can be enjoyed as part of a fun snack or dessert that doesn’t compromise your nutritional goals.
Sugar
With roughly 8 grams of sugar in each cookie, it’s important to savor these beauties mindfully. The sweetness is balanced by the visual appeal, making them perfect for special occasions without overindulging.
Enjoy making and sharing your stained glass cookies while keeping their nutritional profile in mind!
FAQs about Stained Glass Cookies
Baking stained glass cookies is a magical experience, from mixing the colorful dough to seeing the vibrant candy windows melt into a beautiful design. But like any recipe, it’s natural to have questions as you embark on this creative culinary journey. Here are some FAQs that might help you get started:
How can I prevent my stained glass cookies from spreading?
To keep your stained glass cookies from spreading too much during baking, a few strategies can help:
- Chill the Dough: Before cutting shapes and baking, wrap your dough in plastic wrap and refrigerate for at least 1 hour. This helps solidify the fats, reducing spreading.
- Use Parchment Paper: Always bake on parchment paper, which helps maintain shape and avoid sticking.
- Keep Ingredients Cool: Ensure your butter and other ingredients are properly chilled to keep the dough firm.
Can I use different types of hard candies?
Absolutely! While traditional stained glass cookies often use Jolly Ranchers, you can experiment with any hard candies. Just remember to crush them finely so they melt evenly in your cookie shapes. Colors and flavors play a significant role, so choose candies that complement your design preferences.
Are stained glass cookies suitable for special dietary needs?
Yes! You can tailor stained glass cookies to accommodate various dietary needs. Consider these substitutions:
- Gluten-free: Use a 1:1 gluten-free flour blend for a gluten-free version.
- Dairy-free: Replace butter with a dairy-free alternative like coconut oil or vegan butter.
- Sugar substitutes: For a healthier option, swap granulated sugar with a sugar substitute like erythritol or coconut sugar; just keep in mind the texture might vary.
Making adjustments can still yield delightful results, ensuring everyone can enjoy the beauty of these unique treats!
Conclusion on Stained Glass Cookies
Baking stained glass cookies is not just a fun kitchen project; it’s a delightful experience that wraps your home in warmth and joy. The vibrant colors of the candy in these cookies are sure to impress friends and family, making them a perfect treat for festive gatherings or simple afternoons. As you savor these delightful creations, you’ll likely find that sharing them enhances the joy even further. Remember, the key to perfect stained glass cookies lies in using high-quality ingredients and taking your time with the dough. Embrace the process, and enjoy every sweet moment!
Print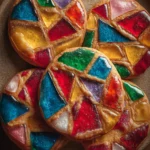
Hard Candy Cookies
- Total Time: 1 hour
- Yield: 24 cookies 1x
- Diet: Vegetarian
Description
Delicious sugar cookies with a colorful candy center!
Ingredients
Scale
- 1 cup unsalted butter, softened
- 1 cup granulated sugar
- 1 large egg
- 1 teaspoon vanilla extract
- 2 1/2 cups all-purpose flour
- 1 teaspoon baking powder
- 1/2 teaspoon salt
- 1 1/2 cups crushed hard candies (such as Jolly Ranchers, in assorted colors)
- Optional: food coloring for dough
Instructions
- Start by preheating your oven to 350°F (175°C). Line two baking sheets with parchment paper and set them aside.
- In a large mixing bowl, cream together the softened butter and granulated sugar until the mixture is light and fluffy. This should take about 3-5 minutes with an electric mixer on medium speed.
- Beat in the egg and vanilla extract, mixing until well combined.
- In a separate bowl, whisk together the all-purpose flour, baking powder, and salt. Gradually add the dry ingredients to the wet ingredients, mixing on low speed until just combined. Do not overmix.
- If desired, divide the dough into portions and add a few drops of food coloring to each portion, kneading the color in until evenly mixed.
- Chill the dough in the refrigerator for about 30 minutes to make it easier to roll out.
- Once chilled, roll out the dough on a generously floured surface to about 1/4-inch thickness. Use cookie cutters in various shapes to cut out cookies.
- Use a smaller cookie cutter or the end of a piping tip to cut out the center of each cookie, creating a window effect.
- Place the cookies onto the prepared baking sheets, leaving some space between each one.
- Place crushed hard candies into the center of each cookie, filling the cut-out spaces.
- Bake in the preheated oven for about 8-10 minutes, or until the edges are lightly golden and the candies have melted.
- Allow cookies to cool on the baking sheets for a few minutes before transferring them to wire racks to cool completely. The hard candy will harden as they cool.
Notes
- Cookies can be stored in an airtight container for up to a week.
- Feel free to experiment with different flavors of hard candies!
- Prep Time: 30 minutes
- Cook Time: 10 minutes
- Category: Dessert
- Method: Baking
- Cuisine: American
Nutrition
- Serving Size: 1 cookie
- Calories: 150
- Sugar: 12g
- Sodium: 90mg
- Fat: 7g
- Saturated Fat: 4g
- Unsaturated Fat: 2g
- Trans Fat: 0g
- Carbohydrates: 20g
- Fiber: 0g
- Protein: 1g
- Cholesterol: 30mg